Showing posts with label Desserts. Show all posts

Cherry custurd

Img_1509a_2
Cherry Custard
adapted from Dorie Greenspan’s Paris Sweets
makes one 9-in clafouti or (8) 2 1/2-in ramekins
3 large eggs
6 tablespoons (75 g) sugar
1 cup (240 g) crème fraîche
2 teaspoons vanilla bean paste
11 ounces (330 g) cherries, pitted (you may need fewer cherries if you make individual clafoutis depending on how many you can fit in the ramekins)
Preheat the oven to 400 degrees F. Butter a 9-in baking dish or pie plate, or individual ramekins, and place on a baking sheet.
Whisk the eggs together in a mixing bowl.
Add in the sugar and whisk to combine.
Add in the crème fraîche and whisk just until incorporated.
Whisk in the vanilla bean paste.
Stir in the cherries gently.
Pour the batter into the prepared pan, making sure the cherries are distributed evenly.
Bake in the oven for about 25 minutes (if you are making individual ramekins, be sure to check halfway through to see if they are baking faster) until the batter looks puffed and golden and is set in the center.
Let custard cool for about 15 minutes out of the oven before serving. You can also serve at room temperature – it will keep for about 12 hours.

Apple, Almond & Buckwheat Muffins


 gks_apple_muffins_05
Apple, Almond & Buckwheat Muffins
Makes 12 muffins
These muffins are only sweetened with apples and dates. We make our own apple sauce and even though it is unsweetened, it has a naturally sweet flavour that works perfect in this recipe. Since the muffins are not overly decadent, we enjoy them both as weekend breakfast and weekday dessert. However, if you know that you like your muffins more on the sweeter side, you can replace have of the apple sauce with maple syrup.
Dry ingredients1 cup / 100 g almond flour
1 cup / 100 g rolled oats (use cert. gluten free if intolerant)
2/3 cup / 75 g buckwheat flour 
2 tbsp arrowroot (or potato starch)
1 1/2 tsp baking powder
1/2 tsp baking soda
1 tsp ground cinnamon
1 tsp ground cardamom
½ tsp ground ginger
½ tsp sea salt
Wet ingredients160 ml / 2/3 cup plain unsweetened yogurt or plant yogurt
80 ml / 1/3 cup coconut oil, butter or olive oil
10 fresh soft dates, pitted and mashed
3 large eggs (or 3 tbsp chia seeds mixed with 9 tbsp water)
1/2 cup / 120 ml apple sauce, unsweetened (see below for instructions hot to make your own)3 organic apples
Preheat the oven to 400°F / 200°C. Grease a muffin pan with oil or butter or line it with muffin tins. Add all the dry ingredients to a food processor or blender and process on high speed so the oats turn into coarse flour and all ingredients are mixed. Transfer to a large mixing bowl. Add eggs, yogurt, coconut oil, dates and 1/3 cup / 80 ml of the apple sauce (save the rest for later) to the food processor or blender and mix until smooth, and then transfer to the mixing bowl with the dry ingredients. Grate two of the apples and add them to the batter. Divide the batter into the muffin tins, filling them only half way up. Drop a heaping teaspoon of apple sauce in the middle of each muffin and then cover with the remaining batter. Slice the last apple thinly, brush the slices with oil and place one or a few slices on top of each muffin, pressing them down slightly. Dust with cinnamon. Bake for about 18-20 minutes. Let cool for a bit before taking them out of their tins and they will release easier. Enjoy!

Apple SauceApple sauce is one of the simplest things to make and if you choose a sweet variety of apples, no other sweetener is needed. This makes more than you need for the Apple Muffin recipe, which is good as you can add large spoonfuls of the leftovers on top of yogurt or cultured buttermilk in the morning.
1 lb / ½ kg organic apples
¼ cup / 60 ml water
1 tsp lemon juice
Core the apples, cut them in ½ inch / 1 cm dices and add to a large sauce pan on medium heat together with the water. Bring to a boil and then turn down the heat slightly. Let simmer for 20-25 minutes. Use a hand blender to mix it smoothly. Add lemon juice and stir around to prevent the color from going brown. Store in air-tight glass jars the fridge for up to about a week or in plastic containers in the freezer for-like-ever.
gks_apple_muffins_06

Blueberry, Lemon & Almond Cake


Blueberry, Lemon, Poppy Seed & Almond Cake
Serves 8-10
Inspired by Coco’s and Elana’s almond cakes.
4 cups (400 g) almond flour
3 tbsp poppy seeds
1/2 tsp salt
1 tsp baking powder
1/2 tsp baking soda
1/2 cup (120 ml) rapeseed oil or ghee
1/2 cup (120 ml) honey or maple syrup
2 small organic lemons
3 large eggs (replace with chia seeds* if you are vegan)
2 cups (300 g) blueberries (save half for topping)
Glazing1 cup/240 ml (250 g) Turkish yogurt, drained (use vegan cream cheese if you are vegan)
2 tbsp honey or maple syrup
1 tsp vanilla extract
Preheat oven to 350°F / 180°C. Combine almond flour, poppy seeds, salt, baking powder and baking soda in a large bowl and set aside. Heat oil and honey in a sauce pan on very low heat until combined. Grate the zest from the 2 lemons and add it to the honey/oil batter. Divide them in half and squeeze the juice from three of the halves into the mixture, saving one half for the glazing. Add the batter to the bowl with the dry ingredients. Beat the eggs and then fold them into the batter together with 1 cup of the blueberries. Stir gently around with a wooden spoon until combined. Grease a 8-inch spring form cake tin, and add the batter to it.
Bake for about 40-50 minutes (depending on size of the pan and oven), or until golden on the outside and baked all way through (you can cover the cake with tin foil during the last 15 minutes of the baking time, if it starts looking burned) . Remove from oven and let cool for at least 30 minutes before removing the sides. Meanwhile, start making the glazing. Drain yogurt in a milk cloth or coffee filter for about 10 minutes. This is to make the yogurt less runny. Discard the water and combine the thick yogurt with honey vanilla extract and the juice from the remaining lemon half. Leave to chill in the fridge. When the cake has cooled completely, cover it with glazing, top with the remaining blueberries and serve. You could also just serve the cake with blueberries and yogurt on the side.
* You can replace three eggs with 3 tbsp chia seeds and 9 tbsp water that you combine and let sit for 15 minutes.

Frozen Pink Cheesecake


Frozen Pink Cheesecake
Crust:
300 g (2 cups) almonds
10-12 fresh dates, pitted
2 tbsp coconut oil
a pinch of salt
Filling:
2 cups fresh (or frozen) raspberries & strawberries
juice from 1/2 lemon
1/2 cup honey
1 cup mascarpone cheese
1 cup 
quark or curd (you could probably also replace it with a fat Greek or Turkish yogurt)
Topping: 
1 cup fresh summer fruit and a couple of edible flowers
Grind almonds in a blender or a food processor for about a minute. Add dates, coconut oil and salt and run the processor until it all comes together. Flatten it out on the bottom of an 8-inch non-stick spring form. Store in the fridge while you make the filling.
Blend berries, lemon juice and honey. Stir together mascarpone, curd and the blended berries in a large bowl. Pour it on top of the crust in the spring pan and put it in the freezer for 1-2 hours (you can keep it in the freezer for days but then you have to let it soften a bit before you serve it) .
Top the cake with fresh fruit and a couple of flowers. Serve immediately.

Spiced Parsnip Cake

Spiced_parsnip_cake_5
Spiced Parsnip Cake
Serves 8
This recipe is gluten free. But if you don’t have any gluten free flours at home, you can replace the oat flour, rice flour and arrowroot with 1 3/4 cups / 200 g spelt flour.
3/4 cup (120 g) rice flour
1 cup (90 g) oat flour
2 tbsp arrow root powder or potato starch
2 tsp baking powder
1 tsp cinnamon
1/2 tsp vanilla powder
1/2 tsp ground ginger
1 pinch clove
1 pinch salt
225 g / 1/2 lb (3 small/medium) parsnips
1 orange, zest
4 eggs
3/4 cup / 160 ml honey or maple syrup
3/4 cup / 160 ml cold-pressed rapeseed oil or cold-pressed olive oil
Topping
7 oz / 200 g quark/curd or cream cheese (or unsalted labneh)
1 tbsp maple syrup or honey
1 orange, juice and zest

1 cup / 125 g roasted hazelnuts, roughly chopped
Preheat the oven to 350°F / 175°C. Line the sides and base of a 20-22 cm / 8-9 inches springform tin with parchment paper. Sift together the flours, arrowroot, baking powder and spices.
Peel and grate the parsnips (you can keep the peel on if you use organic) and zest the orange.
Beat the eggs in a large bowl until frothy. Add the oil and maple syrup and beat for another minute.
Stir in the parsnip and orange zest and then fold in the flours. Pour the mixture into the prepared springform tin. Bake on the middle shelf of the oven for about 45 minutes, or until golden and an inserted skewer comes out clean. Leave to cool before before removing it from the springform tin.
Make the icing by simply stirring together quark or cream cheese with maple syrup and orange juice. Spread the icing over the cake when it has cooled completely. Garnish with roasted hazelnuts and orange zest.
If you are making it ahead; store the cake in the fridge and add icing and topping just before serving.

Chocolate Zucchini Cupcakes

[cupcakes photo]

Chocolate Zucchini Cupcakes Recipe

Wet Ingredients:1-1 1/2 cups (packed) shredded zucchini, about 1 medium
1 green to yellow banana
3/4 cup demerara sugar
1/2 cup canola oil
1 tbs instant coffee
3 tbs creme de menthe

Dry ingredients:1 1/4 cup whole wheat pastry flour
4 tbs (1/4 cup) flax seed, ground
1/4 cup cocoa
1/2 tsp baking powder
3/4 tsp baking soda
3/4 tsp salt
For the icing:
4 oz unsweetened chocolate
1 tbs coconut oil
2 tbs creme de menthe
3-4 tbs honey
1 tsp vanilla extract
big pinch of salt
1 tbs canola oil, if needed

Directions:
  • Preheat the oven of 350 degrees.
  • Peel and shred the zucchini with a hand grater or food processor, set aside.
  • Combine the dry ingredients, set aside.
  • In a mixer, combine the wet ingredients (except for the zucchini) and beat until just about uniform.  Sometimes the banana stays a little bit lumpy and that’s ok.  Stir in dry ingredients, scraping down the sides and bottom of the bowl.  
  • Stir in the zucchini.  Use an ice cream scoop and divide into cupcake cups.  I got 15 cupcakes, but no joke, I ate a significant amount of batter.  
  • Bake for 15-20 minutes, until they are nicely domed and tops spring back with a tiny touch.  You can also test to see if a toothpick comes out clean. Mine were done at 18 minutes.

For the icing:
 put the coconut oil and chocolate in a microwave bowl for 60 seconds.  Stir, then microwave for 30 seconds.  Repeat with decreasing times until smooth.  Stir in the creme de menthe, honey, vanilla, and salt.  The alcohol will make the chocolate “seize up”, keep stirring and add the extra tbs of canola oil if needed.  The icing is very rich like a ganache, so just spread a thin layer on each cupcake.  Garnish with a fresh mint leaf.

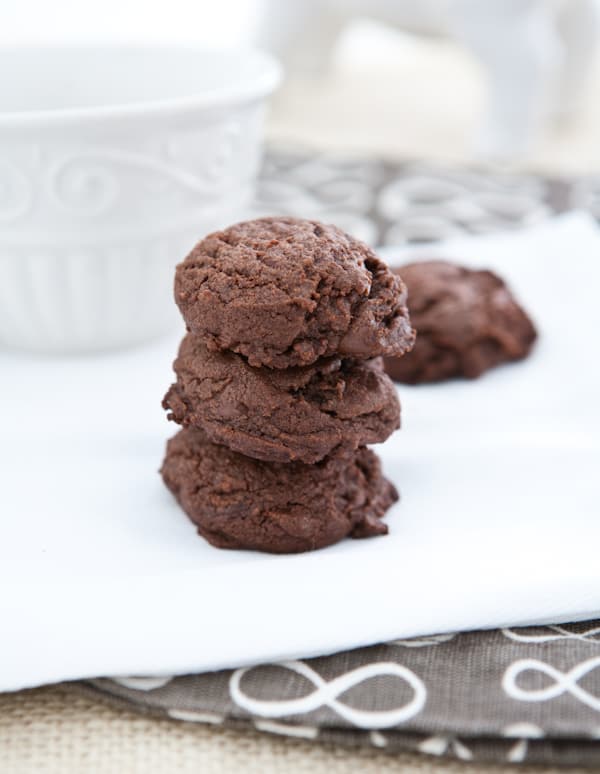
Double Chocolate Chip Cookies

chocolate-1

Double Chocolate Chip Pudding Cookies

INGREDIENTS:
2 sticks butter
1 cup brown sugar
1 1/2 cups flour
1/2 teaspoon salt
2 eggs
1 (3.9 oz) instant chocolate pudding
1 teaspoon vanilla extract
1/2 cup cocoa powder
1 teaspoon baking soda
2 cups semi-sweet chocolate chips

DIRECTIONS:
Heat oven to 350°. Cream butter and sugar together. Add eggs and mix well. Add chocolate pudding mix and vanilla extract. Mix well. Sift flour, cocoa, baking soda and salt together. Add to cookie dough and mix until just combined. Scrape down sides of mixing bowl and mix again. Add chocolate chips and mix until combined.

Chill cookie dough in the refrigerator about 1 hour, enough that it is pretty firm. Scoop by the tablespoon on a parchment paper lined cookie sheet. Bake for 10 - 12 minutes, or until just set. Cool on cookie sheets 2 minutes before transferring to a wire cooling rack.


chocolate-3

Berry Pie

RHUBARB BERRY PIE

Who knew something that looked like celery , but red and with poisonous leaves could create such a wonderful pie? And then, if you pair its tartness with the robust sweetness of berries you can get an even better pie! Oh, wait… everyone already knew this didn’t they. Yes. I am a little late hopping onto this Rhubarb wagon but when it comes to food there’s  no old dog in this pup (as in you can’t teach an old dog new tricks). I suppose it just took me a while to give rhubarb a try. Needless to say I love it. If you haven’t tried it I suggest doing so. If you decide to, why not try this recipe out.


An overfilled, leaky Rhubarb Berry Pie
I do love  berries. They are the category of fruit I like best for using in desserts… and often raw, on their own for breakfast. I love each separately, as each brings such a wonderful and unique flavor to the table–eaten raw each brings a unique eating experience as well.  I like blackberries and strawberries best, but blueberries are never in short supply in my kitchen either.But together, especially in a pie or trifle, they seem to work so well together. Those three are the three berries I like to combine most and sometimes raspberries when I can find them, but I don’t often go out of may to find them.
You’ll also notice my pie was a tad leaky. I like foods best this way: overfilled so they are  almost obligated to leak their delicious juices everywhere just before serving. Yes, I do have to clean my stove almost nightly because of this philosophy, but its the small treats that accompany a bursting dish like the finger taste of exposed sauce before digging into the pie that keeps me smiling in the kitchen. Pies are as easy to make as they come, but there are some things I find helpful to know in making a good pie.
We’ll start with the crust, the often overlooked aspect of a pie that often proves to be its most vital. You of course are wanting a delicious, flakey crust that compliments, and never detracts from the pie filling. To get this I suggest a butter, shortening combination for the fat (usually half and half). You’ll get the delicious from the butter and the flaky from the shortening. These should be very cold before mixing them with the flour; toss each in the freezer ten minutes before you begin. I use a food processor and think it works best, though you can also use your hands. You never want to completely mix or blend the flour into the fat. You want there to be little layers of fat pockets (butter and shortening) that melt away between the layers of flour, creating the flakiness. So mixing it to where there are still pea sized chunks of the fat in the butter is best–hence having it very cold before mixing. You can see how using a food processor (pulsing a few brief times) can achieve this quickly, especially  faster than your hands. And that can be key as you dont want the butter and shortening to melt and blend too much into the flour. With the water you’ll again want to make sure it is very cold–toss it in the freezer a few minutes before using; you’ll only want to use just enough water to make the dough cohesive.

Pie Crust Ingredients2 1/2 cups flour
1/2 cup butter (very cold)
1/2 cup shortening (very cold)
1 1/2 teaspoons salt
1 1/2 tablespoons sugar
5-9 tablespoons water (very cold)
Pie Crust Instructions
1. Mix the flour, sugar and salt in a food processor until well blended.
2. Add the cold shortening and pulse the processor 8 to 12 seconds until it has combined into a coarse mixture.
3. Add the cold butter and pulse 8 to 10 times for a second each until you get pea sized (or slightly larger) chunks of butter.
4. Pulsing a few more times, very briefly each time, slowly add water until the dough begins to come together. You want a fairly solid structure that is not sticky or damn at all.
5.  Roll all the dough together and divide into two balls. Roll each out into a 4 inch disk, and wrap each in plastic wrap. Refrigerate the dough for an hour (in the coldest part of your fridge).
Next is the pie filling, another super simple phase. Here is where the fruit will shine, so aside from a decent amount of sugar, and a little bit of corn starch and flour, you do not need a whole lot, otherwise you’ll start affecting the flavor of of he berries to much. The only thing to prepare for filling the pie. Before pouring in the filling over the pie crust, you’ll want to sprinkle equal parts sugar and flour, or egg wash the bottom of the crust. This will help keep the crust from getting soggy or gooey from the filling. To get a golden top to your pie there are a couple things you’ll need to do. I go into detail regarding those below.
Filling Ingredients
2 cups (3-4 stalks) Rhubarb diced (rough large dices will do)
1 cup strawberries cut into large peices
1 cup blueberries
1/2 cup blackberries
1 1/2 cups sugar
1 tablespoons flour
2 1/2 tablespoons cornstarch
1 teaspoon cinnamon
1 teaspoon vanilla extract
1 teaspoon freshly squeezed lemon juice
4 tablespoons butter diced

Pie Crust Topping Ingredients1 egg
1/4 cup heavy cream
1/4 cup sugar

Instructions
Filling:
1. Preheat oven to 425 degrees.
2. Mix all the ingredients except the 4 tablespoons diced butter in a large bowl. You’ll want to make sure the fruit is all well coated with all of the dry ingredients; You’ll also want to make sure the extract and lemon juice has a chance to get mixed in with all of the other ingredients.
2. Take one of the crust disks out of the refrigerator. On a floured surface roll it out to a size slightly larger than the baking dish. This will need to be large enough to create the bottom and sides of the crust.  Press the crust into the baking dish–I used a fairly shallow (for a pie) pie/tart ceramic baking dish.
3. Sprinkle equal parts flour and sugar (just enough to lightly cover) on the crust. This will help keep it from getting soggy from the pie filling.
4. Pour in the pie filling, making sure to spread it through the pie evenly.
5. Sprinkle the diced butter on top of the pie filling. I create a grid of evenly spaced butter mostly because i’m OCD.
6. Take out the second crust disk from the refrigerator and roll it into a disk big enough to completely cover the top of the pie. Lay it over top and crimp the edges to seal it to the bottom crust.
7. Cut a few slits in the top of the pie. This will help steam escape, which is a good think for a berry pie cooked for so long.
Now for topping the crust. To get a nice and golden crust you’ll need to so something to the top. Some people like using egg whites and water (this gives a shiny, but not often dark crust), some people just milk, or just eggs. I like to use egg and heavy cream (the same basic ingredients for great french toast, or custard, or so much more). After that a little sugar can go a long way to not only adding shine and sparkle, but a sweet touch to an already delicious crust.
Topping:
8. Whisk together the egg and cream until well mixed. Use a bigger bowl then you’re going to want to initially, as this will aid in the whisking process. Use a fork or whisk.
9. Either brush the egg wash over the crust, or like I did, use a spoon to drizzle the  wash on. I used the drizzle method because I couldn’t find my brush at the time; I also think drizzling gives you more creative freedom to create a deliciously modern looking pie.
10. Sprinkle sugar on top. I suggested 1/4 cup but really it’s up to you. Be careful using more as it could create a soggy, heavy top crust.
Bake!
11. Bake for the first 15 minutes at 425.
12. Reduce the temperate to 375. Bake for another 40 to 45 minutes. The filling should be bubbling. 
For me, since I used a shallower dish, I was signified with a few leaks of what is a delicious rhubarb and berry sauce.
If you’re offended by the sight of a messy pie dish, or the thought of sauce oozing onto your plate, placement or table, then please don’t just use a paper towel to clean way the leaks! Use you’re fingers and enjoy every minute of it. Think of this as a pie appetizer. Just make sure you let it cool a bit! As for the pie cooling, I am a  man who loves things hot, so I served myself a slice almost automatically. I also burnt my tongue, so maybe I should have waited. I’m sure if you let it cool a bit you might also have an easier time of enjoying the flavors. That’s what I did for my seconds, and after cooling slightly, you really do get to taste the melody of mixed berries and deliciously tart rhubarb.
If you haven’t noticed I’ve taken a liking to pies and tarts lately. Every day I feel like I’m getting better with the process, and the crust has been one I’ve felt obligated to perfect. I think the aforementioned pie crust might be darn near perfect… until I find myself adopting that baking secret… lard! So because I feel as this is a particularly pretty pie, and equally delicious, and because everybody finished it before I could get thirds, I wish to immortalize it here with a second picture.


My favorite pie yet!

CHOCOLATE MOUSSE

CHOCOLATE MOUSSE

Last night, at around midnight, I got my typical late night craving for something sweet. Unfortunately, we were all out of cookies (a rarity for the van K house). In fact we didn’t gave any of the other usual delicious dessert treats waiting to be devoured. I was presented with a blank canvas on which I had endless options–something I very much like. I was also quite tired as I had prepared a taco night with homemade salsa, queso and guacamole–an easy but time consuming task. All the simple things came to mind like more cookies, brownies, maybe even a cake, possibly a tart, but alas I was fairly bored with these go-to desserts. Besides, after said taco night, I was feeling something light was in order. Mousse!
I browsed the internet, focusing on my favorite food website, foodnetwork.com, to find a recipe I could emulate. I found this one by Tyler Florence and thought it would do the trick. It did. I tweaked just a couple things, and the result was a rich, delicious chocolate mousse that I’m sure I’ll be making time and time again.

Ingredients:
1 cup heavy cream (1/2 cup separated)
7 ounces semi-sweet chocolate
3 1/2 tablespoons butter
3 large egg yolks
1/4 cup plus six tablespoons sugar (3 tablespoons separated)
3 large egg whites
1/2 teaspoon cream of tartar
Chocolate for shaving (garnish)

Instructions:
  • Melt the butter and the 7 ounces of semisweet chocolate in a bowl placed over a saucepan with water at a slow boil (no more than an inch of water because it can destroy your delicious). Stir until completely melted and well mixed.
  • Beat in the egg yolks 1 at a time with a whisk until well mixed. Set aside.
  • In another bowl beat the egg whites until foamy. Add the cream of tartar and beat until soft peaks begin to form. Slowly add the sugar and beat until stiff peaks form. Set aside.
  • Using a chilled bowl, whip 1/2 cup of the heavy cream until it thickens. Add the 3 teaspoons of sugar and continue beating until soft peaks appear.
  • Now gently fold the egg white mixture into the chocolate. After that is mostly folded in, gently fold in the whipped cream. Be sure not to over mix. Divide into 5 or six glasses (I use champagne glasses because I think they’re pretty for this application).
  • Chill for at least an hour.
  • Before serving make another batch of whipped cream (using the remaining 1/2 cup cream and 3 tablespoons separated sugar). Top each glass with whipped cream and chocolate shavings. This can be as easy as running chocolate over a fine/medium grater.


Enjoy! I know I am, as I am on my second now.

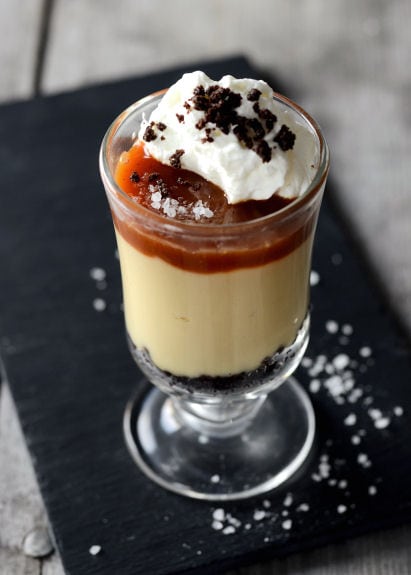
Caramel Budino

Salted Caramel Budino


Layers of chocolate cookie crumbles, rich caramel custard, salted caramel sauce and whipped cream make up this scrumptious Italian dessert.


Ingredients:
For the Cookie Crust:
1 cup finely crushed chocolate wafer cookie crumbs (such as Nabisco Chocolate Wafters or World Table Chocolate Cookie Thins), about 20 cookies
1/8 teaspoon sea salt
2 tablespoons butter, melted

For the Budino:
3 cups whole milk, divided
5 large egg yolks
1/4 cup cornstarch
3/4 cup packed dark brown sugar
3/4 cup water
3 tablespoons butter, softened
2 teaspoons vanilla extract or dark rum
1 teaspoon coarse sea salt

For the Salted Caramel Sauce:
1 cup granulated sugar
Extra coarse sea salt
6 tablespoons butter, cut into pieces
1/2 cup heavy cream
1/2 vanilla bean, split lengthwise
1/8-1/4 teaspoon coarse sea salt
Whipping cream

Directions:
For the Cookie Crust:
In a small bowl, mix together the cookie crumbs, butter and salt. Set aside 2 tablespoons of the mixture in a covered bowl and refrigerate. Press 2 tablespoons of the crumbs into the bottoms of each of eight 8-ounce containers (you can use mason jars or whatever other pretty containers you have on hand).

For the Budino:
In a small bowl, whisk together 1/2 cup of the milk and the cornstarch until smooth. Set aside. In a small saucepan over medium heat, heat the remaining milk just until simmering. Set aside.
To make the caramel stir the sugar and water together in a heavy saucepan set over medium heat until all the sugar dissolves. Increase heat to high and cook without stirring until an instant read thermometer reads between 210-215 degrees F.
Have ready a large, heat-proof pitcher. Place the egg yolks in a large heat-proof bowl and whisk. Gradually whisk in the hot milk; add the cornstarch mixture. Slowly whisk in the caramel. Return custard to saucepan. Cook over medium heat, whisking constantly, until it thickens and an instant-read thermometer registers 175 degrees F, about 3-5 minutes.
Remove from heat. Whisk in the butter, vanilla and salt. Pour into the heat-proof pitcher.
Pour 1/2 cup of the budino into each of the prepared jars. Cover with plastic wrap and chill until set, about 3-5 hours.

For the Salted Caramel Sauce:
Place the cream into a small pitcher and scrape in the vanilla seeds and the pod. Set aside.
Place the sugar in medium heavy bottomed saucepan. Cook over medium heat, stirring vigorously with a wooden spoon the whole time.
Once the sugar has completely melted, add the butter pieces, one at a time. Whisk until the butter has completely melted before adding another piece.
Wait for about 3 seconds, then add the vanilla cream slowly. Whisk until nice and smooth. Add the salt and whisk to combine. Strain into a heat proof bowl and let cool slightly.
Spoon 2 tablespoons of the caramel sauce over each chilled budino. Sprinkle with a little coarse sea salt. Top with lightly sweetened whipped cream and the reserved cookie crumbles. Enjoy!

Notes:
You can make the custard up to 1 day in advance, keeping chilled.
hope you guys will love it. :)

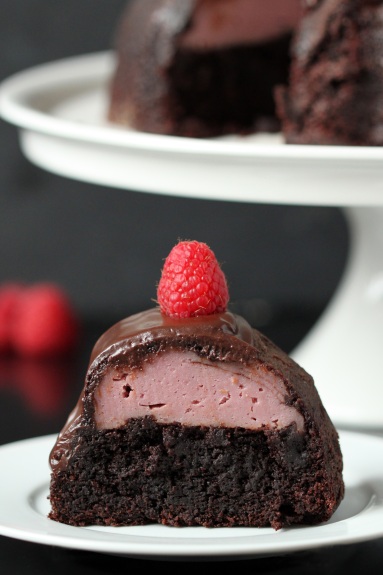
Chocolate Raspberry Cheese Bundt Cake

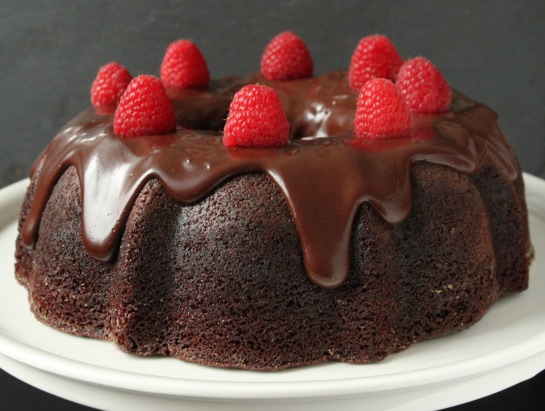
Chocolate Raspberry Cheese Bundt Cake

An extremely moist 100% whole wheat chocolate bundt cake with a tunnel of raspberry cream cheese filling and a healthier chocolate ganache.

Whole Wheat Chocolate Raspberry Cheesecake Bundt Cake

Ingredients:
For the raspberry sauce:
1 1/2 cups frozen raspberries
2 tablespoons honey
1 1/2 teaspoons lemon juice
3/4 teaspoon cornstarch mixed with 1 tablespoon cold water
For the filling:
8 ounces cream cheese, room temperature
2 eggs
1/4 cup whole wheat flour
2 teaspoons vanilla
1/3 - 1/2 cup raspberry sauce
1/3 cup sugar

For the cake:
1 3/4 cups sugar
1 teaspoon baking soda
1 3/4 cups whole wheat flour
3/4 cup cocoa powder
1 1/2 teaspoons baking powder
1 teaspoon salt
2 eggs
6 ounces plain Greek yogurt
1/2 cup canola or vegetable oil
1 tablespoon vanilla
1 cup boiling water

For the ganache:
1/4 cup honey
3 1/2 tablespoons coconut oil
1/2 teaspoon vanilla
1/4 cup cocoa powder
2 - 5 tablespoons plain Greek yogurt
8 - 12 fresh raspberries, for garnish

Directions:
For the raspberry sauce:
In a medium saucepan over medium heat, stir together the frozen raspberries, honey and lemon juice. Bring to a boil, turn heat down to low, and let simmer for 15 minutes. Remove the pan from the heat and strain the seeds with a food mill or a sieve.
Return the raspberry mixture back to the pan and place back on the heat. Add the cornstarch which has been mixed with water. Bring it to a boil and let simmer for another 5 minutes. Set aside to cool completely. This should yield about 1/3 cup of sauce.

For the filling:
Beat the cream cheese, eggs, sugar, flour and vanilla in a medium bowl with a hand mixer. When well combined, add in the raspberry sauce. Set this aside.

For the cake:
Preheat the oven to 350 degrees F. Prepare a 12 cup bundt cake pan by spraying it with cooking spray and flouring. Do not skip the flour! In a large bowl, stir together the sugar, flour, cocoa powder, baking powder, baking soda and salt. Add the eggs, Greek yogurt, oil and vanilla. With a hand mixer, mix for 2 minutes on medium speed and then stir in the boiling water. The batter will be extremely thin; almost like water. Pour all of the batter into the prepared pan. Gently and slowly pour in the filling, trying to keep it about 1 inch away from the edges of the pan. The more in the center you can keep it, the better.
Bake for 50 - 55 minutes. Let the cake cool for 10 minutes in the pan and then invert onto a wire rack to cool completely.

For the ganache:
In a medium saucepan over low heat, melt the honey and coconut oil. Once melted, add the vanilla and then the cocoa powder. Stir until thoroughly combined. Let cool for 5 minutes and then stir in a tablespoon of Greek yogurt at a time, until you like the consistency. I used 3 tablespoons. When the cake has completely cooled, pour the ganache over the cake and garnish with raspberries right before serving, if desired. Store, covered, in the refrigerator for up to 5 days.

Notes:
To get clean cuts, use two knives. One to cut the cake, and another to scrape the knife clean after each slice.


Whole Wheat Chocolate Raspberry Cheesecake Bundt Cake

source:goodlifeats

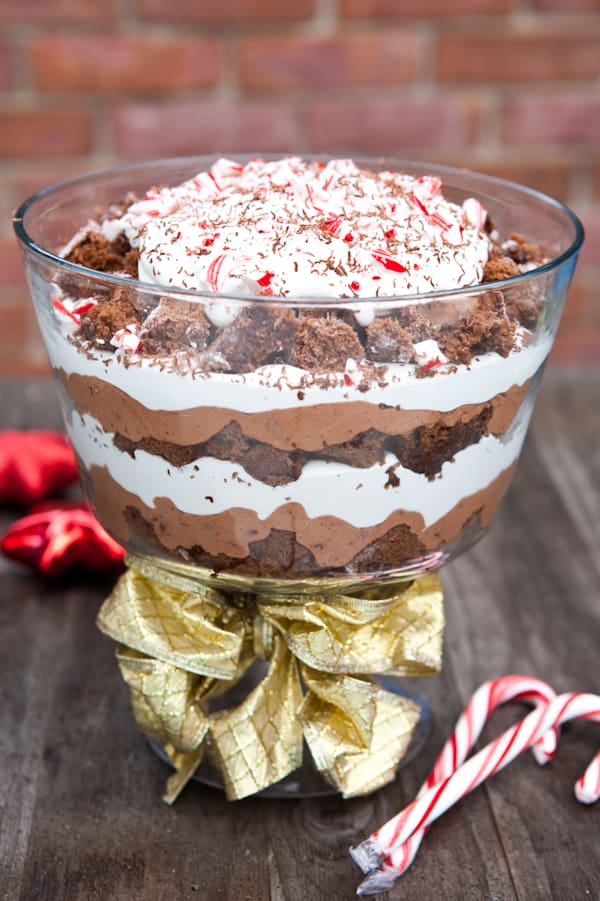
Peppermint Chocolate Trifle


Chocolate Peppermint Trifle

Ingredients:
For the Cake:
3 eggs
1 cup sugar
1/3 cup water
1 teaspoon vanilla
3/4 cup all purpose flour
1/3 cup cocoa powder
1 teaspoon baking powder
1/4 teaspoon salt

For the whipped cream:
2 cups heavy cream
2 tablespoons powdered sugar
For garnish:
2 Peppermint candy canes, crushed
1 tablespoon semi-sweet baking chocolate, grated

For the chocolate filling
1 (3.9 oz) package instant Chocolate pudding
1 1/2 cups whole milk
1 1/2 cups heavy cream
Peppermint baking chips

Directions:

  • Heat oven to 375°. Line a 15 x 10 inch jelly roll pan with parchment paper. Spray with non-stick spray grease with butter.
  • In stand mixer, add eggs. Whip on high for 5 minutes until light in color and thickened. Turn mixer to low and add vanilla and water. 
  • Sift together flour, baking powder, salt and cocoa powder. Gradually add dry ingredients to eggs and beat just until batter is smooth.
  • Spread batter evenly on cake pan. Bake for 12 – 15 minutes, or until toothpick inserted in center comes out clean.
  • Cool cake completely. Whip chocolate pudding mix with milk until soft set. In another container, whip cream until soft peaks form. Add cream to pudding and mix well. 
  • Add peppermint baking chips and fold together.
  • In a separate bowl, whip cream and powdered sugar until soft peaks form.
  • To assemble trifle, break up cake and divide into 3 portions. Line the bottom of the trifle dish with 1/3 of the cake. 
  • Top with 1/2 of the chocolate pudding mixture. Top with 1/3 of the whipped cream. Add more cake, pudding, cream. Them cake and cream. 
  • Garnish with crushed peppermints and grated chocolate.

CHOCOLATE BERRY CAKE

CHOCOLATE BERRY CAKE

I’m back! ok, ok, so I didn’t actually go anywhere; instead of creating tons and tons of stuff in the kitchen, I’ve been creating a lot next to the kitchen.  I did take some time out of my oh-so-busy schedule though to make what has got to be the best cake I’ve made yet. And while I am not one to make the same recipe more than once in a year or so, I am definitely thinking of making this again very, very soon.
The cake is three easy parts: a delicious chocolate cake, a whipped cream icing, and of course berries. All three parts work off of each other so well. Even if you hate baking/the kitchen I strongly suggest after reading this to go make it because you will fall in love. Yes, it is possible to fall in love with a cake.

Cake Ingredients (Modified from Ina Garten’s Beatty’s Chocolate Cake)

2 cups flour
2 1/2 cups sugar
1 cup cocoa powder
2 1/2 teaspoons baking soda
1 1/2 teaspoon baking powder
1 teaspoon kosher salt
1 cup buttermilk*
1/2 cup plus 2 tablespoon vegetable oil
2 large eggs
2 teaspoons vanilla extract
1 1/8 cup (1 cup 2 tablespoons) freshly brewed, hot coffee (I suggest a good medium roast from a french press)**
4 cups berries of your choice

* Don’t have buttermilk? Place a tablespoon of vinegar in the bottom of a measuring cup. Fill the measuring cup up to the 1 cup mark and let sit for five minutes. Ta-daaaaa!
** The coffee not only adds a dimension but it helps pull out the chocolate flavor. I use a french press for my coffee and believe it delivers the best coffee flavor. You can work with whatever you have. If you have an espresso maker, pull 3 or 4 shots, then dilute with water to make 1 cup (an americano).
Instructions1. Preheat the oven to 350. Line two buttered round baking pans with parchment paper. Butter again and lightly flour. Set aside.
2. Sift the dry ingredients together in a bowl (flour, sugar, cocoa, baking soda, baking powder, salt). If using a stand mixer, put ingredients in the mixer’s bowl.
3. In a separate bowl mix together the buttermilk, vegetable oil & vanilla extract.
4. Slowly beat in the wet mixture into the dry mixture. If you are using a stand/electric mixture use a low speed. Be careful not to over beat everything.
5. Once mixed, slowly add in the coffee. Use a spatula to scrape the sides and bottom. The mixture will be quite runny!
6. Pour into the pans and bake for 28-35 minutes or until a wooden skewer/tooth pick poked in the center comes out clean (a few little bits hanging on is ok and makes for a moist cake). Mine was done at 30 minutes.
7. Cook for 30 minutes in the pan, then invert onto cooling racks and cool completely.

Frosting Ingredients1 package (8 oz) cream cheese, softened
3/4 cup sugar
2 teaspoons vanilla
2 cups heavy whipping cream

Frosting Instructions1. Cream the cream cheese with the sugar until smooth using a mixer over medium speed.
2. Add the vanilla and just mix in.
3. Add the whipping cream and whip over high speed until the frosting is fluffy. Take care not to over whip the cream. Once it holds stiff peaks it is done.*
*When the whip pulls out from the frosting, the peaks that are pulled out should stand up and not fall back into the frosting.
The best part about this cake is you can pair it with your choice of berries. I got the inspiration from a chocolate and strawberry tart, but because I had so many raspberries, and love blackberries, I thought I’d use all three.
Place one of the cake layers on a plate. Toss on 1/2 the berries (I used just raspberries and blackberries for this layer. Set the next cake layer on top. Add the rest of the frosting on top, and then the rest of the berries. I put strawberries in the center with the rest of the blackberries and raspberries around the edge. Dig in and enjoy!
The cake should be able to sit out for a few hours, but after that you’ll want to make sure and keep it refrigerated (because of the whipped cream). Scoop about 1/3-1/2 the frosting on top and smooth over. I sent mine straight to the fridge and kept it there until serving though.
Thanks to everyone who has been reading and thanks for your patients as I take on a hefty, non-culinary endeavor for the next few weeks; I will sure try to continue to cook and post as much as I can!

Chocolate Berry Cake
source:chasingdelicious